Showing posts with label Craft. Show all posts

Wednesday, December 5, 2012

Advent Calendar Week 1


It is about the little things each day, 
which mold into the events in our week, 
which morph into the memories of our month.

It is December and every week I will recall for you what little things we did to celebrate this Christmas month!


Last year I made a super Easy Advent Calendar.  
This year it was even easier!  I just changed the sticky notes inside!


December 1:  We went to the Christmas Zambiza Garbage Dump Party.


"In June of 1997 the Extreme Response founders began working with the 300+ people that lived and worked right there in the trash. These people gleaned their living by digging through the garbage that flows out of the back of garbage trucks, living in small shacks made from pallets and other building materials they found in the trash. They survived on what they found to use, eat and sell."
Because of Extreme Response these people no longer live among the trash and are now taught about personal hygiene, have educational assistance, and work as sorters of the trash for what can be recycled.  Every year Extreme Response hosts a Christmas party for the Zambiza community.  They provide games, picture with santa, crafts, dancing, music, and lunch for about 1900 people!


Our little family plus a friend from our youth group and two girls from the German school were in charge of a game booth.  It was Toss-the-ring-onto-the-glass-bottle!  Once the people from Zambiza got 3 tosses they received a piece of candy!


Very common for the babies & toddlers to be strapped to the back 
of their mom, grandma, or older sister.


For more information about Zambiza Christmas Party click on the link.

December 2:  Husband and Wife went to a Live Concert

The concert was at our local church and performed by Jessa Anderson , her husband Jordan, and our friend Ricky on percussion.
Baby Z was sleeping in a tent downstairs.
This was such a blessing.
We don't get Christian artists coming to Ecuador- so it was so much fun to go to a concert!
(We brought Mosaic too!)


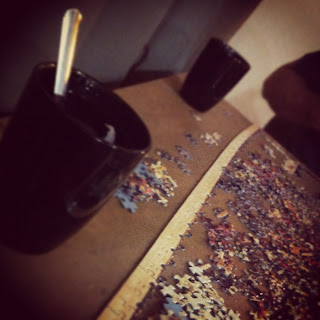
December 3:  Started working on a puzzle while drinking hot tea 

& listening to a sermon by one of our supporting churches.


December 4:  Watched Its a Wonderful Life 

while continuing to work on the puzzle (its a hard one!)


December 5:  Making homemade Apple Cider


 From REAL apples!  Recipe I am using here mixed and matched with this recipe here.


Sipping the delicious cider all gone,

post signature

Tuesday, September 25, 2012

Homemade Christmas Gift for Grandparents!


Turn 4 square wooden blocks into a cute and affordable picture puzzle.

Great homemade Christmas gift for the grandparents!


 Supplies you need: 


  •  Four 2"x2" wooden blocks (8 for both sides of the family)
  • Modge Podge
  • Glue Stick
  • Scissors &/or straight edge cutter
  • 6 photos (duplicate if making two sets)
  • Scrapbook paper
  • Pencil

 Step One:  Label


  • Lay blocks down and label side 1 that is facing up by drawing a circle in the middle of the blocks to see how they will connect with each other.  You can also put a #1 on each square that has a part of the circle so you don't get confused later.  
  • Open the blocks up like a book by taking the two blocks on the left and on the right and turning them so the circle you drew is cut in two and facing away from each other.  Now you have 4 new squares to draw a NEW shape on.  Draw a square in the middle of these blocks with #2.
  • Cut the square in half by turning the two blocks on the bottom and top on their side so the square is facing away from each other.  You should have another 4 blocks with no writing on them yet.  Draw a triangle and label each piece of the triangle #3.  
  • Continue turning over blocks in this fashion until all 6 sides are labeled with 6 different shapes.


Step Two: Create Photo Collage

  • Create mini scrapbook style photo collage for all 6 sides of the blocks with your picture, scrapbook paper, and glue stick. 


 Step Three: Cut 

  • Measure and cut the photos in 4 parts to the exact measurement of your blocks.

 Step Four: Modge Podge like crazy


  • Modge Podge your first photo on the four squares labeled with a circle and the #1.  
  • Turn the blocks over until the square shape with #2 shows up complete.  Put your second photo on those squares.
  • Do the same for the #3 Triangle side as well.  
    • NOTE:  Let the first 3 sides DRY completely before doing the last 3 sides.  This way you won't have your beautiful photo ruined by sticking to your table.

 Step 5: Decorate!

  • Set them on your mantle or coffee table for decoration.
  • Safe present for kids to play with.
  • Enjoy another way to display those pictures you love!